


While Windows 11 keeps stable in general, it may sometimes fail to boot and prevent you from accessing your files. Your computer may not start up at all or it may turn on but fail to boot into Windows. This kind of a situation would make most of us panic, especially when we haven’t backed up our data. This blog will share some reliable solutions to work around this issue and recover your data.
Why My PC Won’t Boot?
Your PC may fail to boot for reasons ranging from software glitches to corrupted system files or even failing hardware. You first need to identify the underlying reason, then troubleshoot the issue and recover your data.
- Corrupted system files: Improper shutdowns, malware or failed updates have corrupted your system files.
- Corrupted Boot Configuration Data (BCD): Windows Boot Manager fails to locate or load the operating system when the BCD is damaged, missing, or incorrectly configured.
- Faulty drivers: The critical drivers on your PC are corrupted or incompatible.
- Failed Windows update: Downloading incompatible or problematic updates can affect the boot configuration data.
- Failing RAM or other hardware: The hard drive containing your OS has developed a lot of bad sectors, RAM is failing, or there are issues with your motherboard.
- Malicious software: A virus or malware is preventing your system from booting.
- Registry corruption: Critical Windows Registry files on your system are damaged.
Methods to Recover Files from a Non-Booting PC?
If your computer fails to boot up, you would be naturally worried about the safety of your important files. Luckily an unbootable operating system does not necessarily mean that your data is lost or damaged. You can often access and recover your files using alternative methods, even when Windows cannot start normally.
1. Use a Bootable USB Drive with Professional Data Recovery Software
This method is applicable when your PC turns on but fails to boot into Windows. It’s also a very user friendly method and does not require you to manually take out your hard drive. Stellar Data Recovery allows you to create a bootable recovery drive which will help you start you’re your computer and recover all your important files.
Note: Make sure you have a USB drive with at least 8 GB of storage space and a separate working computer.
- Plug in the USB drive in the working PC.
- Download and launch Stellar Data Recovery Professional.
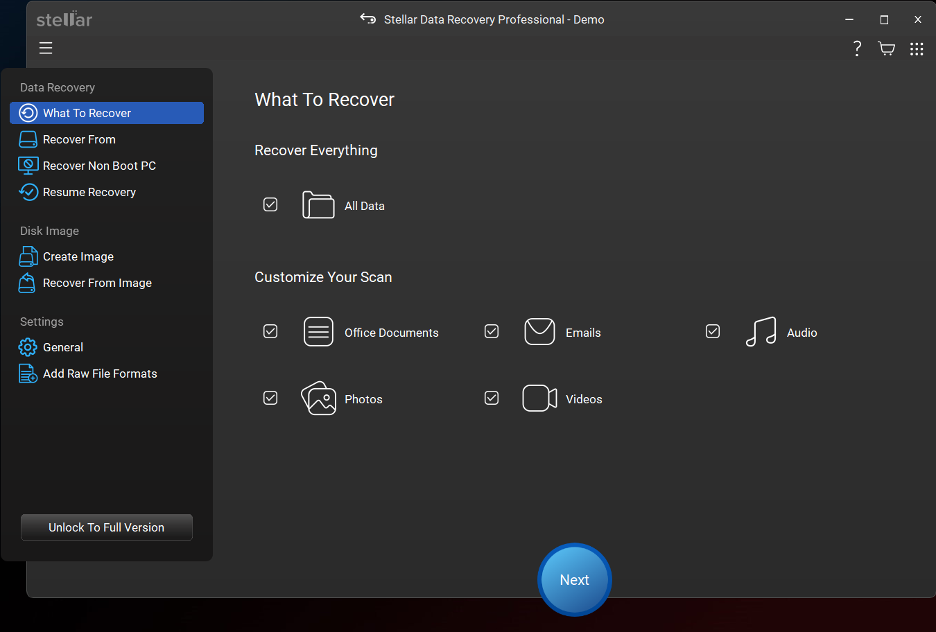
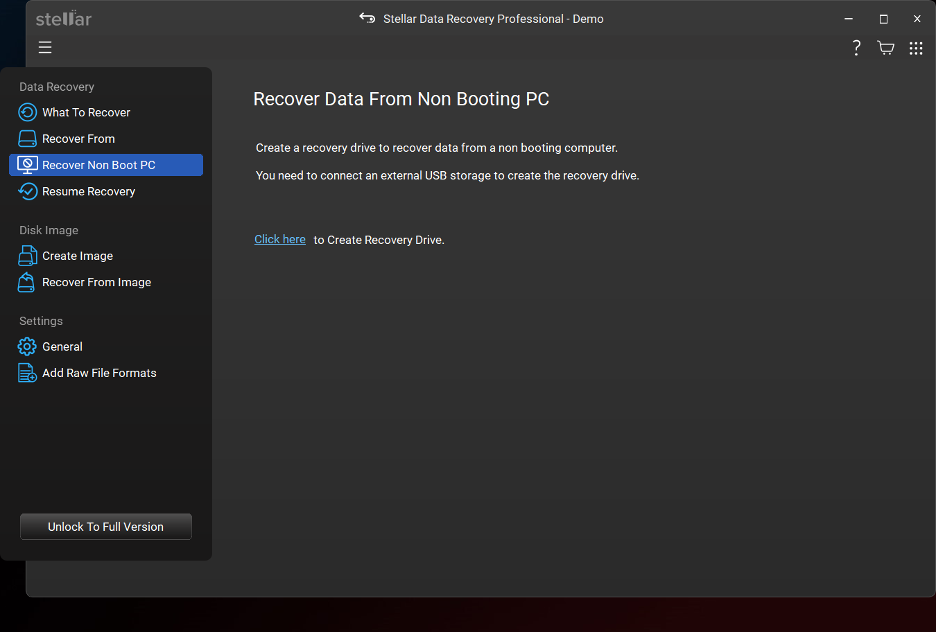
- Click Recover Non Boot PC from the sidebar.
- Select Click Here to create a recovery drive.
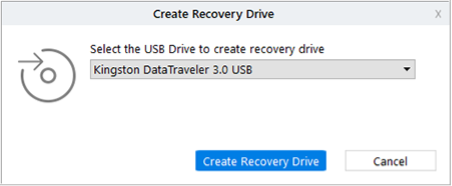
- Select your USB drive from drop down list.
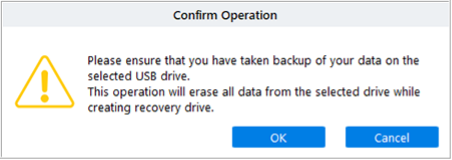
- A dialog box will appear, informing you that all the data on the USB drive will be deleted. Click OK to proceed.
- When the process is complete, an Activation windows will appear. Type the software Activation Key and click Activate.
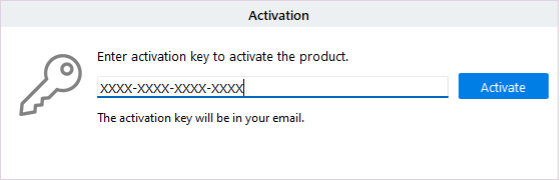
- Software will connect to the license server and verify the Activation Key. If the key is valid, the process completed successfully dialog box will appear.
Once the bootable USB drive is ready, you can proceed to recover your files from the non-booting PC.
- Connect the USB to your non-booting PC and power on.
- Set BIOS boot option to boot from USB drive (For BIOS boot instructions, refer to your computer manufacturer’s documentation).
- Once the PC boots up, Stellar Data Recovery Professional will automatically launch.
- On the What to Recover screen, select the type of data you want to recover.
- Click Next.
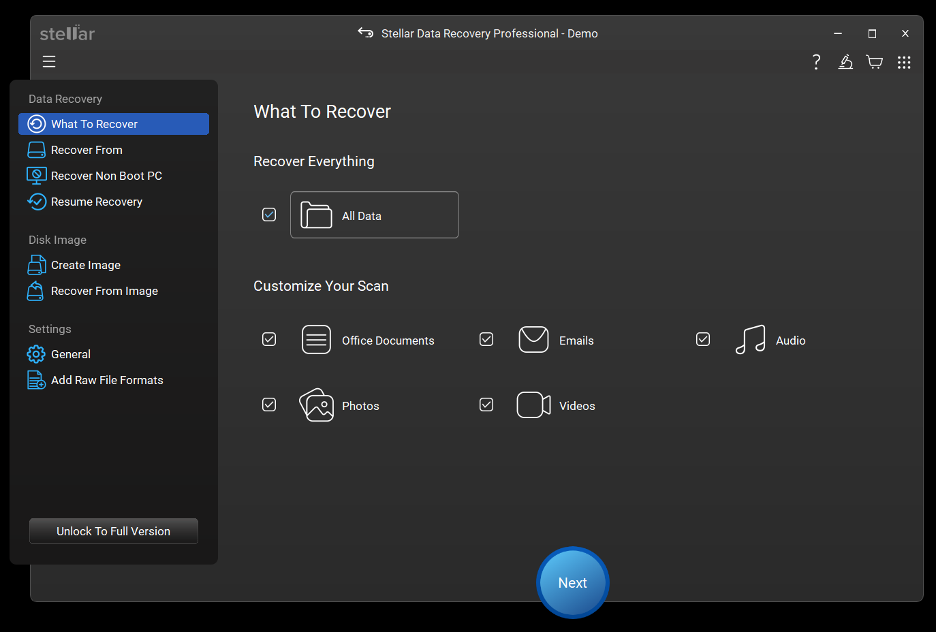
- On the Recover From screen, select the drive volume in which you want to search for lost files.
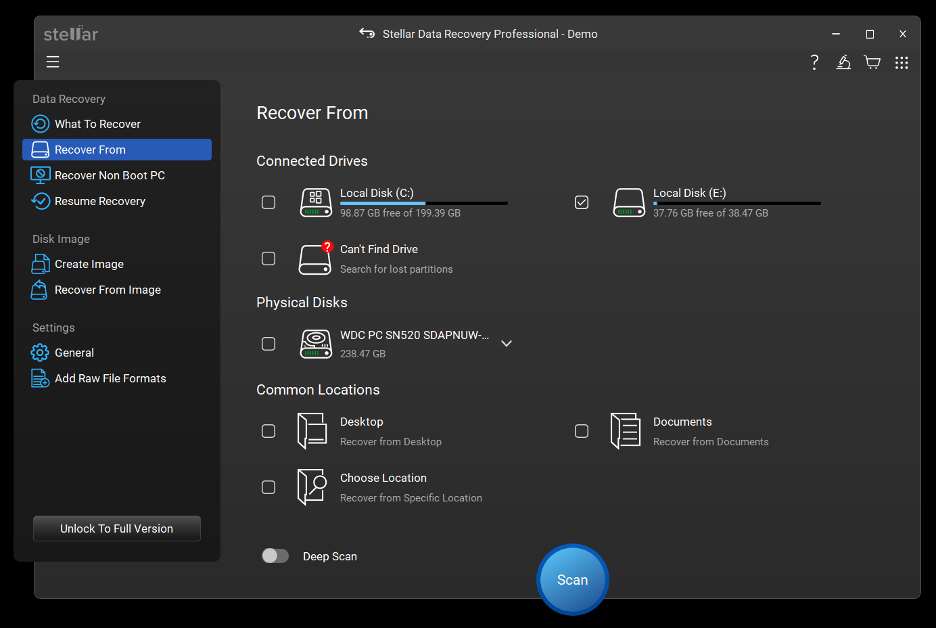
- Click scan. A screen displaying the scanning process will appear.
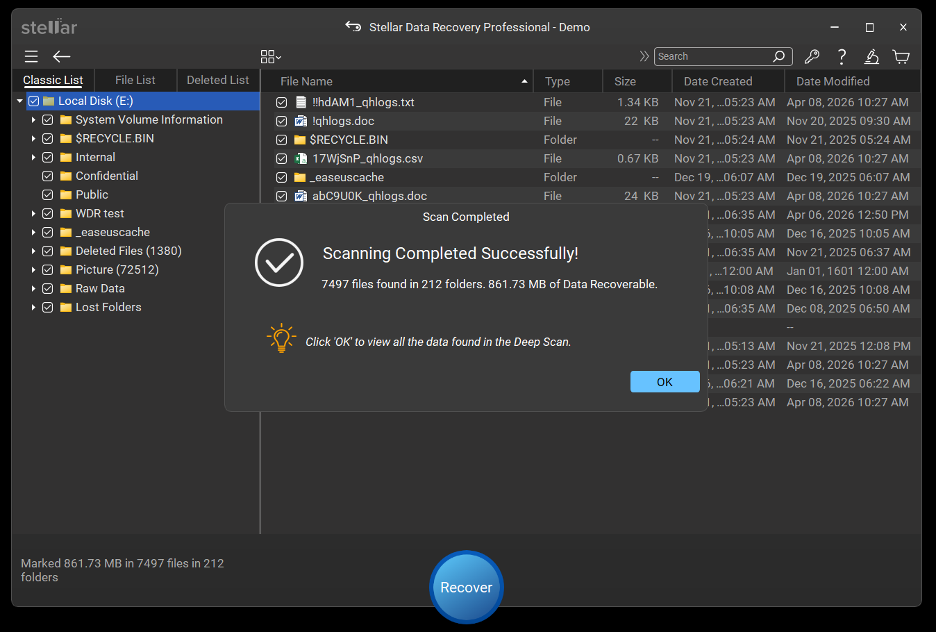
- Recovered files will be displayed for you to.
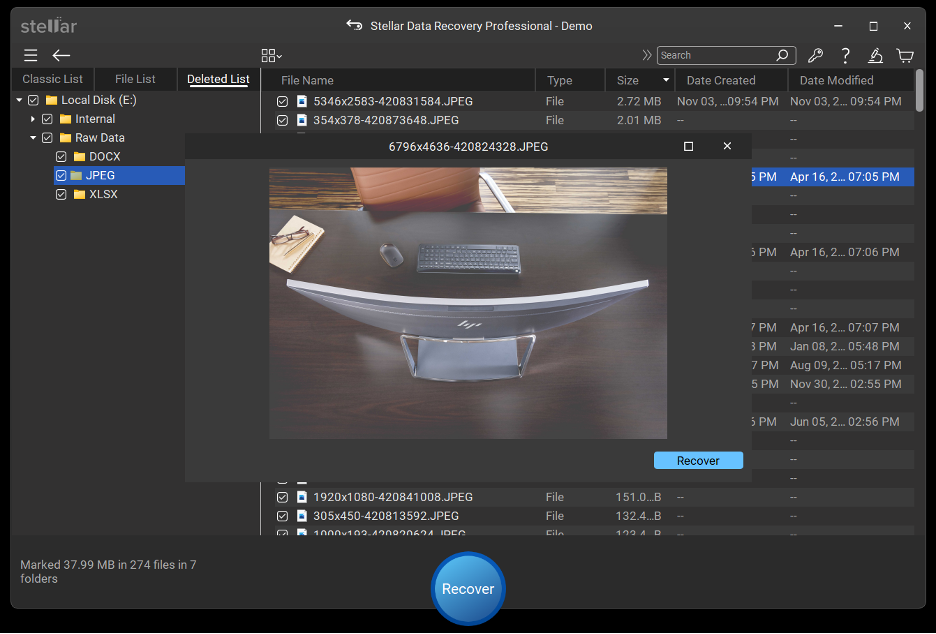
- Select the files you want to retrieve and click Recover to save them at a desired location.
2. Remove the Hard Drive and Connect to Another Working Computer
If your PC fails to turn on at all the you won’t be able to boot using a USB and access your data. In such cases, your only option is to remove the hard drive manually and plug it into another working computer to access the data.
For this you’ll need a SATA-to-USB cable, a docking station, or an external drive enclosure. You’ll also require the necessary tools like a screwdriver to open up your PC and take out the drive. If your laptop uses an M.2 drive, you need to keep a SATA M.2-to-USB adapter or NVMe M.2-to-USB adapter ready.
- Turn off your PC, unplug the power cable, and remove the battery (if applicable). Also disconnect any peripheral device, if using.
- Carefully remove the internal hard drive from the PC. Search online using your specific computer’s model or serial number for a step-by-step walkthrough.
- Place the removed hard drive into a compatible external HDD enclosure or connect it via a compatible adapter.
- Connect the enclosure or adapter to a working computer.
- After you successfully connect it, the drive should show up on the working computer as an external storage device.
- Copy all your important files and move them to a secure storage medium.
3. Use the Robocopy Command via WinRE
Robocopy (Robust File Copy) is a built-in Windows command-line tool to copy files and folders. When Windows cannot boot normally, you can run Robocopy from the Windows Recovery Environment (WinRE) to copy important files from the affected drive to an external storage device. Note that this method is only suitable for users who are comfortable using command-line tools.
- Plug an external storage drive where you want to save your retrieved files.
- Power on your Pc and boot into WinRE.
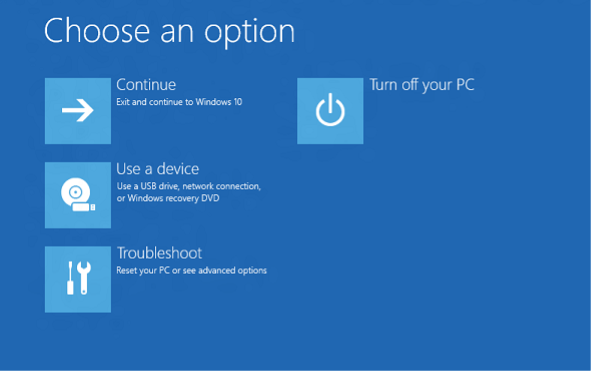
- Go to Troubleshoot > Advanced options > Command Prompt.
- As drive letters in WinRE may be different from normal Windows, use the below commands to list your drives and volumes:
diskpart
list volume
exit
- Note the drive letter of your target partition and the external storage.
- Use the following command to copy and move files from your system drive (source) to your external drive (destination). The basic command looks like:
robocopy <source> <destination> [<file>[ …]] [<options>]
For example, if you want to copy a file named photos.jpg from the Windows system drive (C:) to your external drive (E:), use:
robocopy C:\Users\YourUsername\Pictures E:\RecoveredData photos.jpg
- If you want to copy all files and folders from the Pictures folder, use:
robocopy C:\Users\YourUsername\Pictures E:\RecoveredData /E
Note: Replace C: and E: with the actual source and destination drive letters identified in WinRE. Also replace YourUsername with the name of the Windows user folder.
Summing Up
A non-booting PC does not necessarily mean your files are lost. Depending on whether the computer powers on and the condition of the storage drive, you can recover your data using a bootable USB with data recovery softwares for windows, by connecting the drive to another working computer, or through Robocopy in WinRE. Choose the method that best matches your technical comfort level and situation, and save the recovered files to a separate storage device to avoid overwriting the affected drive. Maintain regular backups to avoid data loss in the future.